
Electroforming Mermaid Seashell Ponytail Cuffs in Copper
***I no longer suggest the use of acrylic sealer or Mod Podge when working with organics and recommend a fast-drying polyurethane. I like aerosol.***
In addition to my electroforming supplies (copper electroforming solution, brightener, distilled water, 2000ml glass beaker, scrap copper, rectifier, magnetic stirrer/hotplate, thin copper wire, and a thick copper wire busbar), I used seashells, UV resin and light, matte clear acrylic spray sealant, a ruler, glitter, thick copper wire, a brass mallet, anvil, liver of sulfur, baking soda, water, Protectaclear Sealant, pliers, and wire cutters for this project.
This project took me 4 days to make 4 ponytail cuffs. I have 2 electroforming setups. If you only have 1, then you will be able to make 2 in the same amount of time.
I don’t go too into detail about the electroforming setup and process in this tutorial. If you are a complete beginner, then I suggest you check out ElectroJewelerJordan on YouTube for easy-to-follow and comprehensive videos. He also has an Etsy shop with a starter setup that I wish I had known about when I began because it is so affordable in comparison to what I spent piecing together my rig. I will include links at the end of the blog post. This is my original design, and if you plan on selling these, then please give me the appropriate credit.
I began by using my wire cutters to cut 8 gauge solid copper electrical wire into 2.5” pieces. I made 4 ponytail cuffs, and so I needed 4 pieces that size. I also cut an additional 4 pieces to the size of the cuff itself (this will make more sense in a moment).

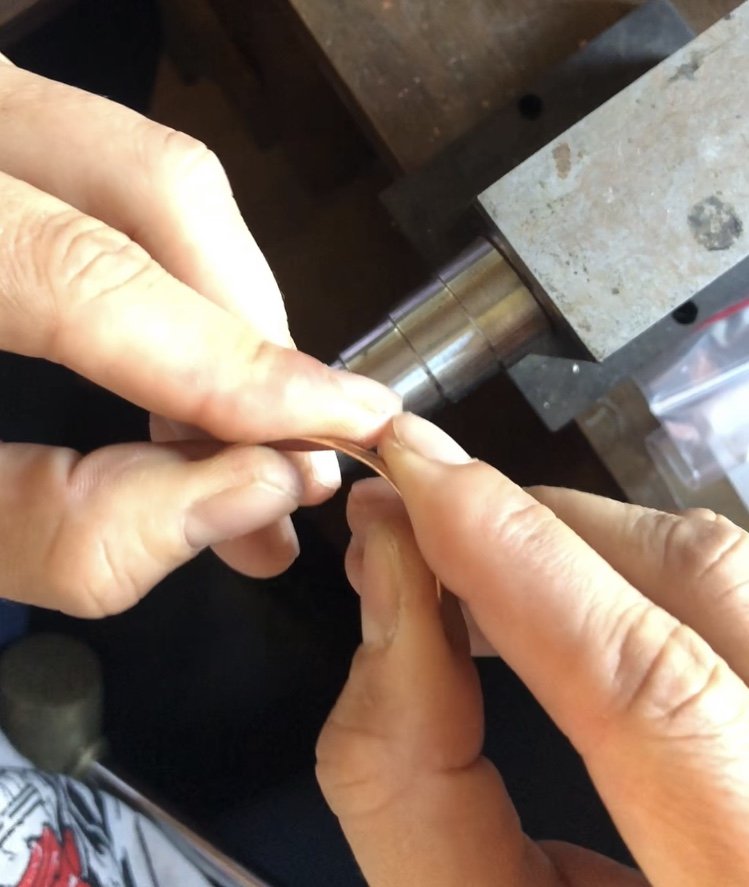
Using a pair of large needle nosed pliers, I bent the ends of the 2.5” pieces into a “U” shape and set them to the side.

I then flattened the “cuff” wires using my mallet and anvil. I then bent, stretched, and shaped them into ponytail-sized half circles (about the outer diameter of a ponytail holder around a thick head of hair).


I then used UV resin to connect the top of the smallest side of the “U” wire to the inner center of the “cuff” wire (as shown below).

Once cured under the UV light, I started to attach my shells. I filled the negative space between the “cuff” wire and the inside of the shells with resin and sprinkled glitter on top before curing to strengthen the attachment and mimic the texture of sand. I added a bead of resin to the long end of the “U” wire to round it so that it would smoothly move through the ponytail holder and hair without catching or pulling.


Once my ponytail holders were constructed and cured, I gave them a quick rinse with warm soapy water to remove any residue from the glitter and the beach. I set them aside to dry.

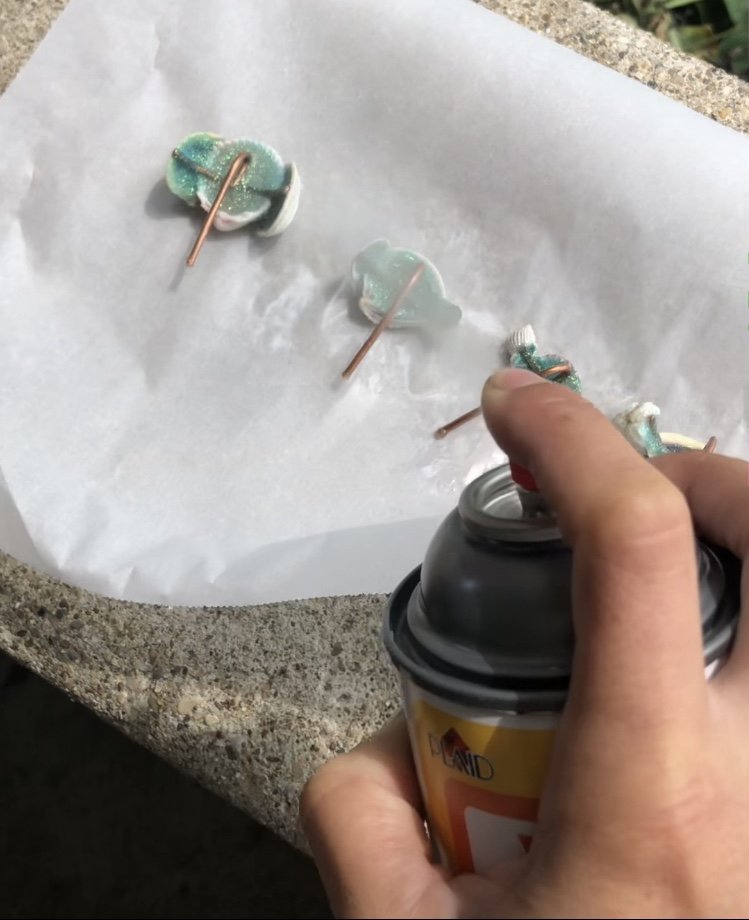
I gave each side of the ponytail cuffs 5 coats of sealant, waiting 15 minutes between sprays and an hour between sides. I used matte clear Mod Podge, but you can use many different kinds of sealant (just be sure to read the instructions about how long to wait between coats and before painting). I prefer acrylics. I let everything cure overnight.
I wear latex gloves for the rest of this process. The next day, I gave the ponytail cuffs 3 coats of copper conductive paint. I waited 2 hours between coats and the third coat was mostly just touching up any blank areas. Copper conductive paint is expensive to buy, but my people use a homemade mixture of Mod Podge and graphite powder. There are many different recipes online (again…I would check out ElectroJewelerJordan).

After letting the paint dry overnight, I set up my electroforming kit to begin the electroforming process. I could fit two cuffs per beaker and estimated their combined surface area to be about 12 inches. Using a 2:1 anode (scrap copper) to cathode (painted cuffs and wire suspension) ratio, I suspended 24 inches of copper in my bath. I loosely wrapped a thin gauge copper wire around each “U” wire and connected them to my thick copper wire busbar. I connected the positive lead of my rectifier to the anode, and my negative lead to the edge of the busbar that would be seated outside the beaker. I turned the coarse amperage all the way down, and the coarse voltage and fine amperage and voltage all the way up. I turned the rectifier on and immersed my cathode. I set my coarse amperage to about .2 (my best estimation of where to begin), slowly bringing it up as the copper began to build. Once the first layer of copper was fully coating each cuff, I brought the amperage up 1.2. I used a stirring bar and my magnetic stirrer on a low setting during the initial copper build but shut it off once it was fully coated because I don’t yet have a filter around my anode and didn’t want the sludge that builds up in the bath to be kicked up and cause unwanted texture on the pieces. The general rule is about .1 amps per 1 square inch, but you want to go low and slow. I agitated the busbar and cuffs every 1-2 hours to keep the cuffs from fusing to the copper wire. After about 12 hours, once my desired thickness of copper was reached, I removed the cuffs and dunked them in a solution of warm water and baking soda to neutralize the acid from the bath.


After rinsing off the baking soda in the sink or with distilled water, I began the patina process. This usually happens the next day because of how long the electroforming process takes but you can do it whenever. I heated up water in a polypropylene food storage container (you can use anything that handles high heat) until it was just about to boil and added a few drops of liver of sulfur. I stirred the mixture well with a glass stirring rod before dunking my pieces until I liked the color. I then immediately dunked them into another baking soda and water solution to keep them from continuing to darken. I gave everything a quick rinse and allowed it to dry before moving on.

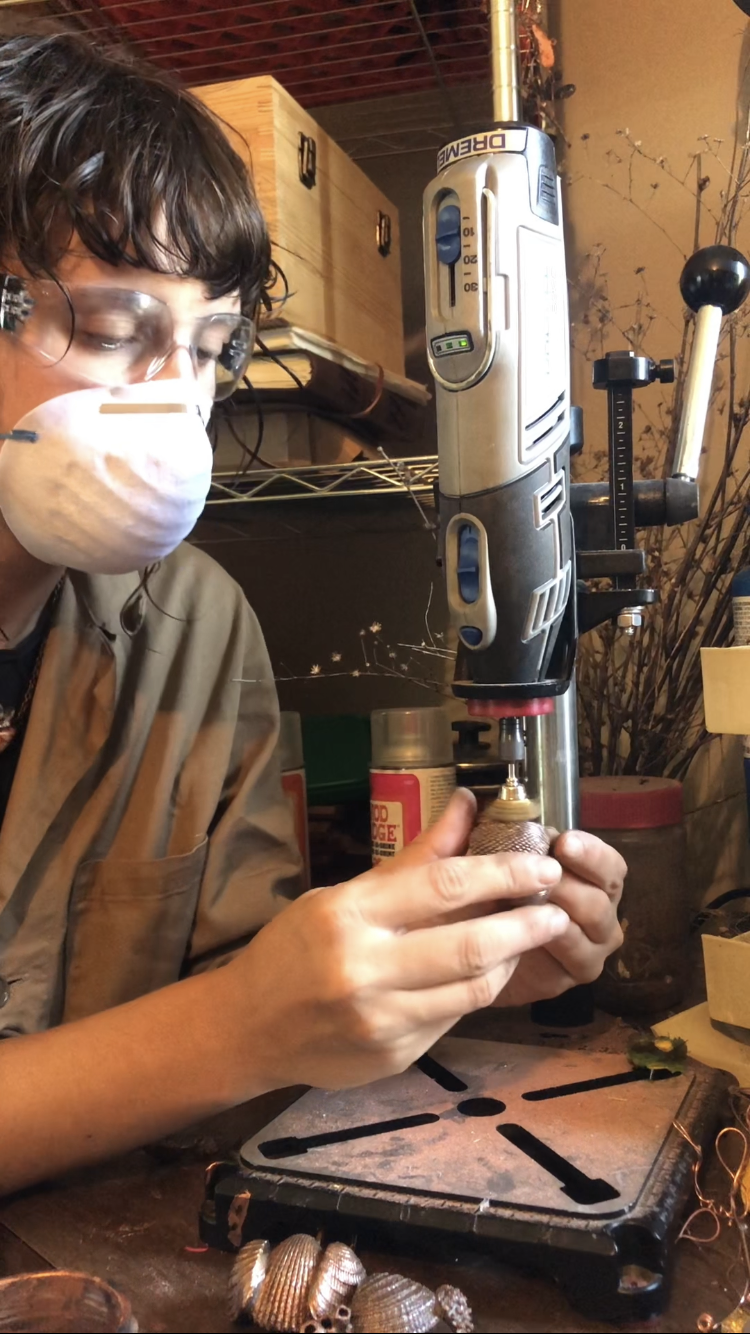
You can polish before or after patina depending on your desired look. I polished the cuffs with a brass wire wheel and my dremel after the patina.
Finally, It was time to seal the ponytail cuffs. Because they are going into hair and will potentially come into contact with a lot of oils and perfumes/chemicals, I gave them 3 coats of ProtectaClear metal sealant. I waited an hour between coats and let them cure on parchment paper for 5 days. In the first two hours (and between coats), I periodically moved them around the paper with a gloved hand to prevent pooling until there was no more excess sealant.
