
Copper Electroforming Mermaid Seashell Hair Forks
***I no longer suggest the use of acrylic sealer or Mod Podge when working with organics and recommend a fast-drying polyurethane. I like aerosol.***
Here is how I did it:
I used 8 gauge copper electrical wire and seashells from my Florida vacation for this project. Other materials include a sharp pocket knife, pliers, wire cutter, metal sandpaper, metal file, ruler, sharpie, latex gloves, mask, safety glasses, UV resin and light, glitter, matte clear acrylic spray, copper conductive paint, a paintbrush, liquid latex, 2000 ml glass beaker, magnetic stirrer, copper anode (I cut up a sheet of pure copper because it is what I have, but copper pipe is cheaper and makes the piece stronger!)), thick copper wire busbar, thin gauge copper wire, brighter, electroforming solution, a magnetic stirrer/hot plate, a rectifier, baking soda, a large container, liver of sulfur, ProtectaClear, disposable paintbrush, and distilled water.
The process takes at least 4 days. I was able to fit 2 hair forks in the beaker at a time. For reference, I have two setups and completed 4 pieces within 5 days. If I had started early enough the first day, then I probably could have done it in 4.
I began by stripping the casing off my electrical wire using a pocket knife. I used even pressure when carving a slit down the middle of the casing before yanking it off with my hands.

Next, I straightened the wire and, using the wire cutters and ruler, cut it into 7” pieces. I measured 3.5” and marked the wire with a sharpie.
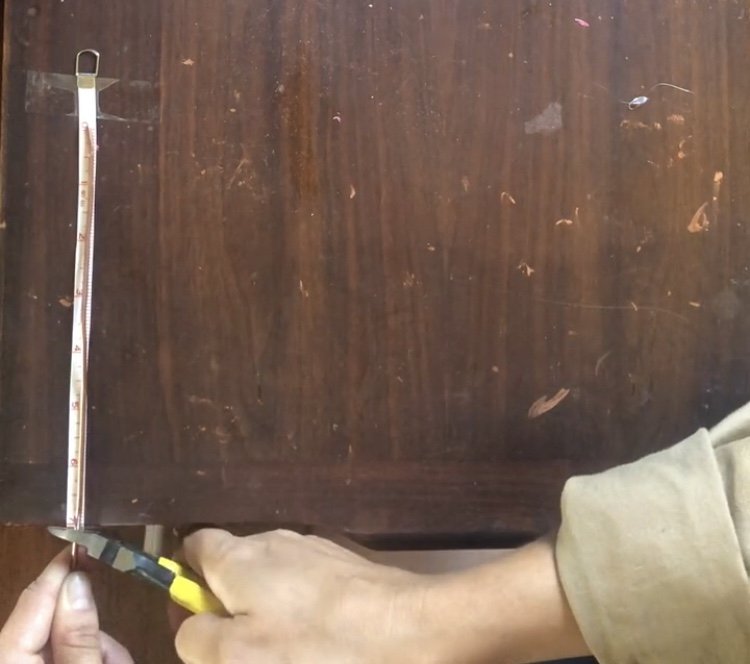

Using the mark as a guide, I bent each wire piece in half around the marker. I then used my pliers to bend matching curves into the wire. Do this part however you like, it is meant to help the hair fork grab the hair better and stay put.


I then cut the ends of each hair fork blank so that they were equal lengths. Using sandpaper and a metal file, I rounded the ends of the wire and buffed out any imperfections that might grab the hair.


Note: The following steps require that the seashells are clean and dry, so make sure to thoroughly wash, rinse, and give time for the shells to dry in advance. Also...wear those latex gloves moving forward!
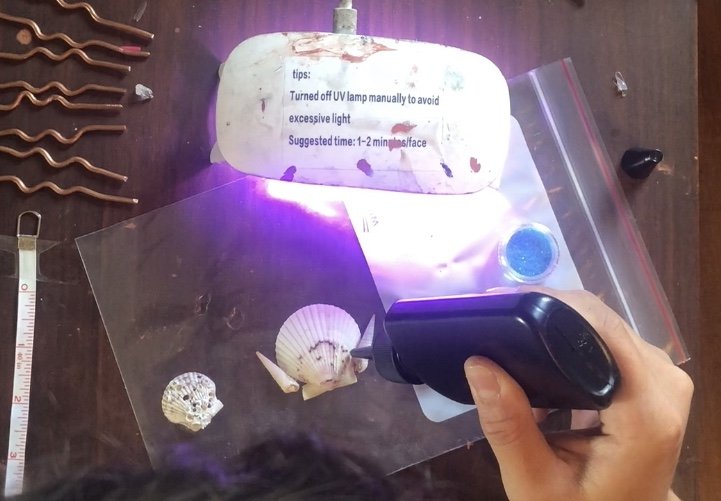
Using UV resin and light, I carefully placed and glued the seashells onto the top curve of the hair forks. I also filled any holes and crevices to make everything watertight. I sprinkled glitter over the wet resin to give a sand-like texture to the areas where it was visible. I allowed each piece to cure for a few minutes under the UV light on each side.

The next step was to coat the pieces with sealant. I kept the hair forks upright by pushing the wire ends into some styrofoam that I had lying around. I used a clear matte acrylic sealant spray to apply 5 coats to the shells, waiting 15 minutes between passes. I did not seal the copper wire.

I allowed the sealant to dry fully overnight, and then in the morning began the process of coating the tops of the mermaid hair forks with a copper conductive paint (you can also use a mixture of graphite powder and matte liquid Mod Podge, but more on that another time). I applied 3 coats of paint total, waiting 2-3 hours between coats for the hair forks to dry.


Early the next morning, after allowing the paint to dry overnight (be sure it is completely dry), I dipped the hair fork wires into liquid latex. I did not want the wire forks to be any thicker than they already were, so I coated everything that I did not want copper to form around. I hung the pieces to dry by making loose circles around the middle of the seashell tops with thin gauge copper wire and forming long hooks.

While the latex dried, I got to work setting up my electroforming supplies in a well ventilated room (fumes=bad). I started early in the morning because I wanted to allow for the most possible electroforming time before bed.
I set my beaker on the hotplate/stirrer and filled it with about 1900 ml of electroforming solution (more on how to make this another time). If it had been winter, then I would have turned the hotplate on its lowest setting and tried to keep it between 70-80 degrees Fahrenheit ( I think anywhere between 65-85 degrees is fine). Instead, I only needed to drop in the magnetic stirrer and turn the stir setting on low. I then added a few drops of brightener (I use Midas brand).
As it blended, I submerged a 2-inch wide strip of copper (the anode) 6 inches into the solution, securing it to the arm that came with my hotplate (I think it is typically used for a thermometer). You typically want a submerged surface area ratio of 2:1 for the anode and cathode, the cathode being the hair fork and wire. Eyeballing the two hair forks I was electroforming in the beaker, I guessed they had about 12 square inches of surface area together.
I clamped the positive lead of the rectifier to the dry portion of the anode. I wrapped the ends of two hair forks’ thin copper wires around my bent thick copper wire busbar before connecting the negative lead of the rectifier to the busbar.
I turned the rectifier on and submerged the cathode.

I set the coarse and fine voltage and fine amperage dials to maximum and turned on the rectifier, slowly bringing the coarse amperage to 1.2 over time (I try not to let the voltage exceed .5). I do about .08 to .1 amps per square inch depending on the level of detail I want. Make sure your rectifier is set to constant current or CC!
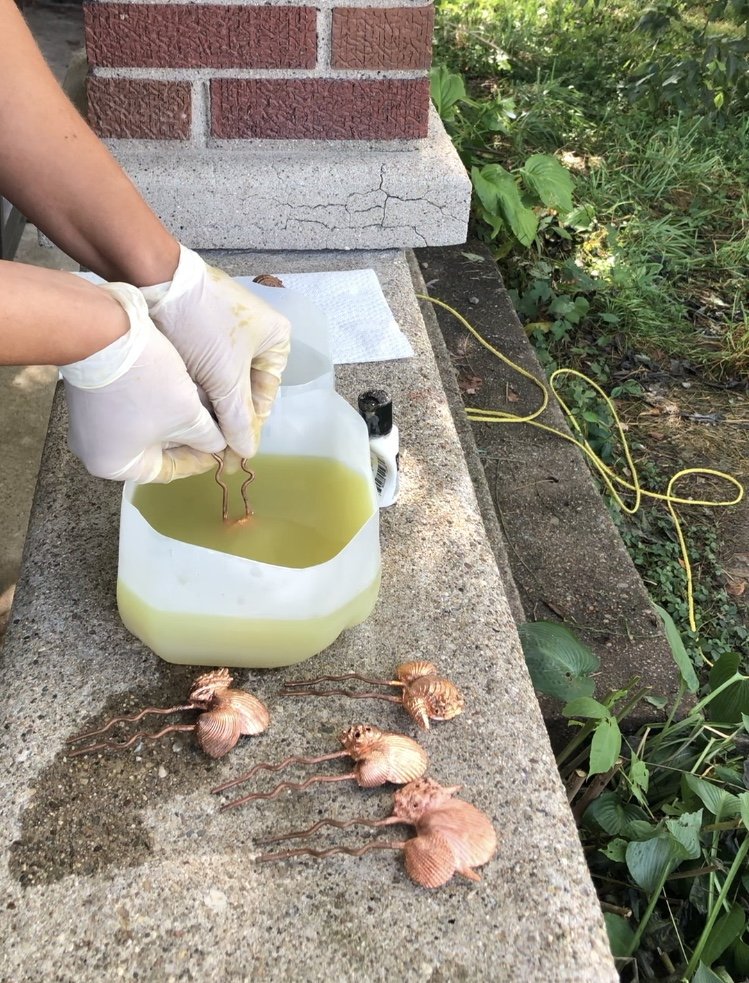
After about 12 hours, when they had reached my desired thickness of copper, I turned off the rectifier, quickly removed the hair forks from the bath, and dunked them directly into a mixture of warm water and baking soda to neutralize the acid. I then washed and dried them before hanging them to dry.

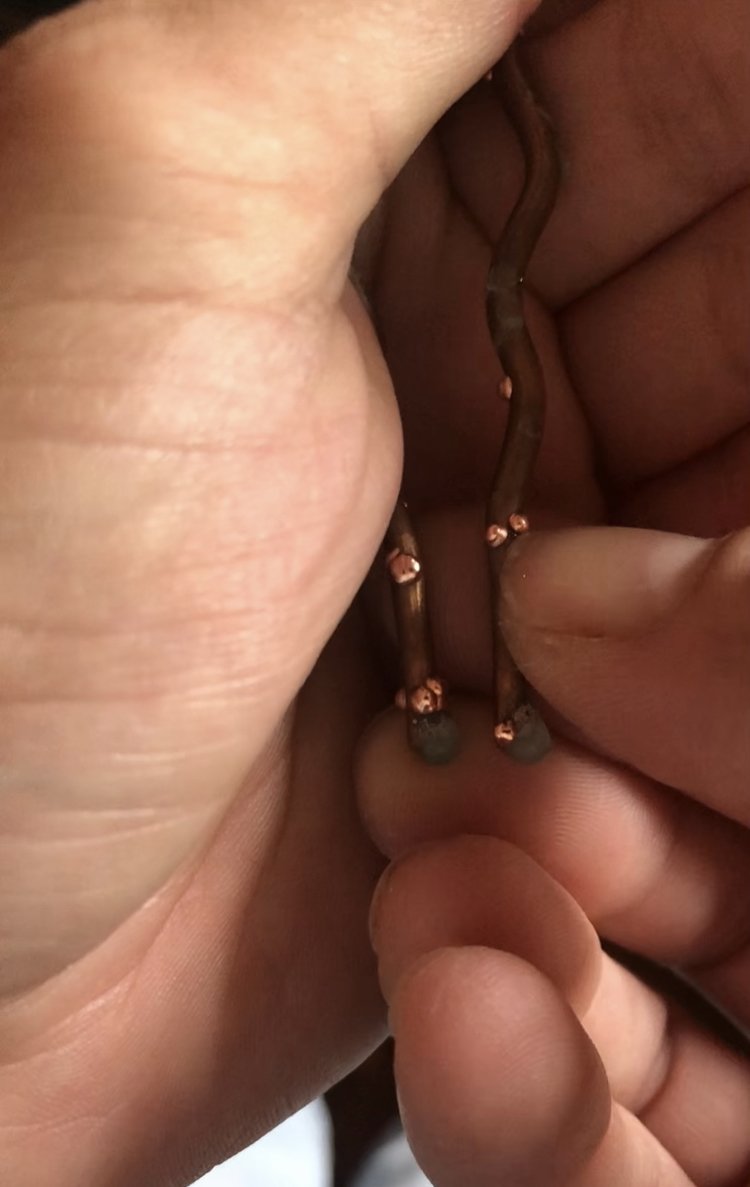
The next morning, I removed the liquid latex and scraped off any copper beads that had formed on top of it.

Working outside, I squeezed a few drops of liver of sulfur into a container of hot water and stirred well with a glass stirrer. I dipped the tops of the hair forks into the solution, leaving them until they reached my desired patina. I dipped them directly into a fresh baking soda and water mixture to neutralize the acid. After a quick wash, I put them back in the Styrofoam to dry. I chose not to patina or seal the thick copper wire of the hair forks because I wanted them to patina and change on their own.
Using a rotary tool with a wire brush (do not be like me…wear a mask and goggles for this part!), I polished the tops of the hair forks. You can do this before or after the patina. To add dimension, I made sure avoid the inside of the crevices with the brush so that they were darker than the high points.

After allowing the hair forks to thoroughly dry, I was ready to seal. Holding the bottom wire ends of the forks, I painted the tops with ProtectaClear and shook them to clear away any excess sealant. One hour later, I repeated the process.

I let the forks cure for at least 5 days before handling them.
And that is how I electroformed Mermaid Seashell Hair Forks in copper.

Thanks for reading and feel free to leave any tips or corrections in the comments!